

So did you guess what we’re making? They are dragon bed-rails to stop my daughter from falling out of her new high bed!
Here’s how we got to this point…
A special bed solves the need for storage:
I bought this brilliant second-hand bed off the Gumtree website because it has so. much. storage under it! It’s an IKEA “Bangsund” bed, and it has as much space under the mattress as a closet! My 7-year-old’s room is pitifully small, so this was a great solution for her growing collection of toys.
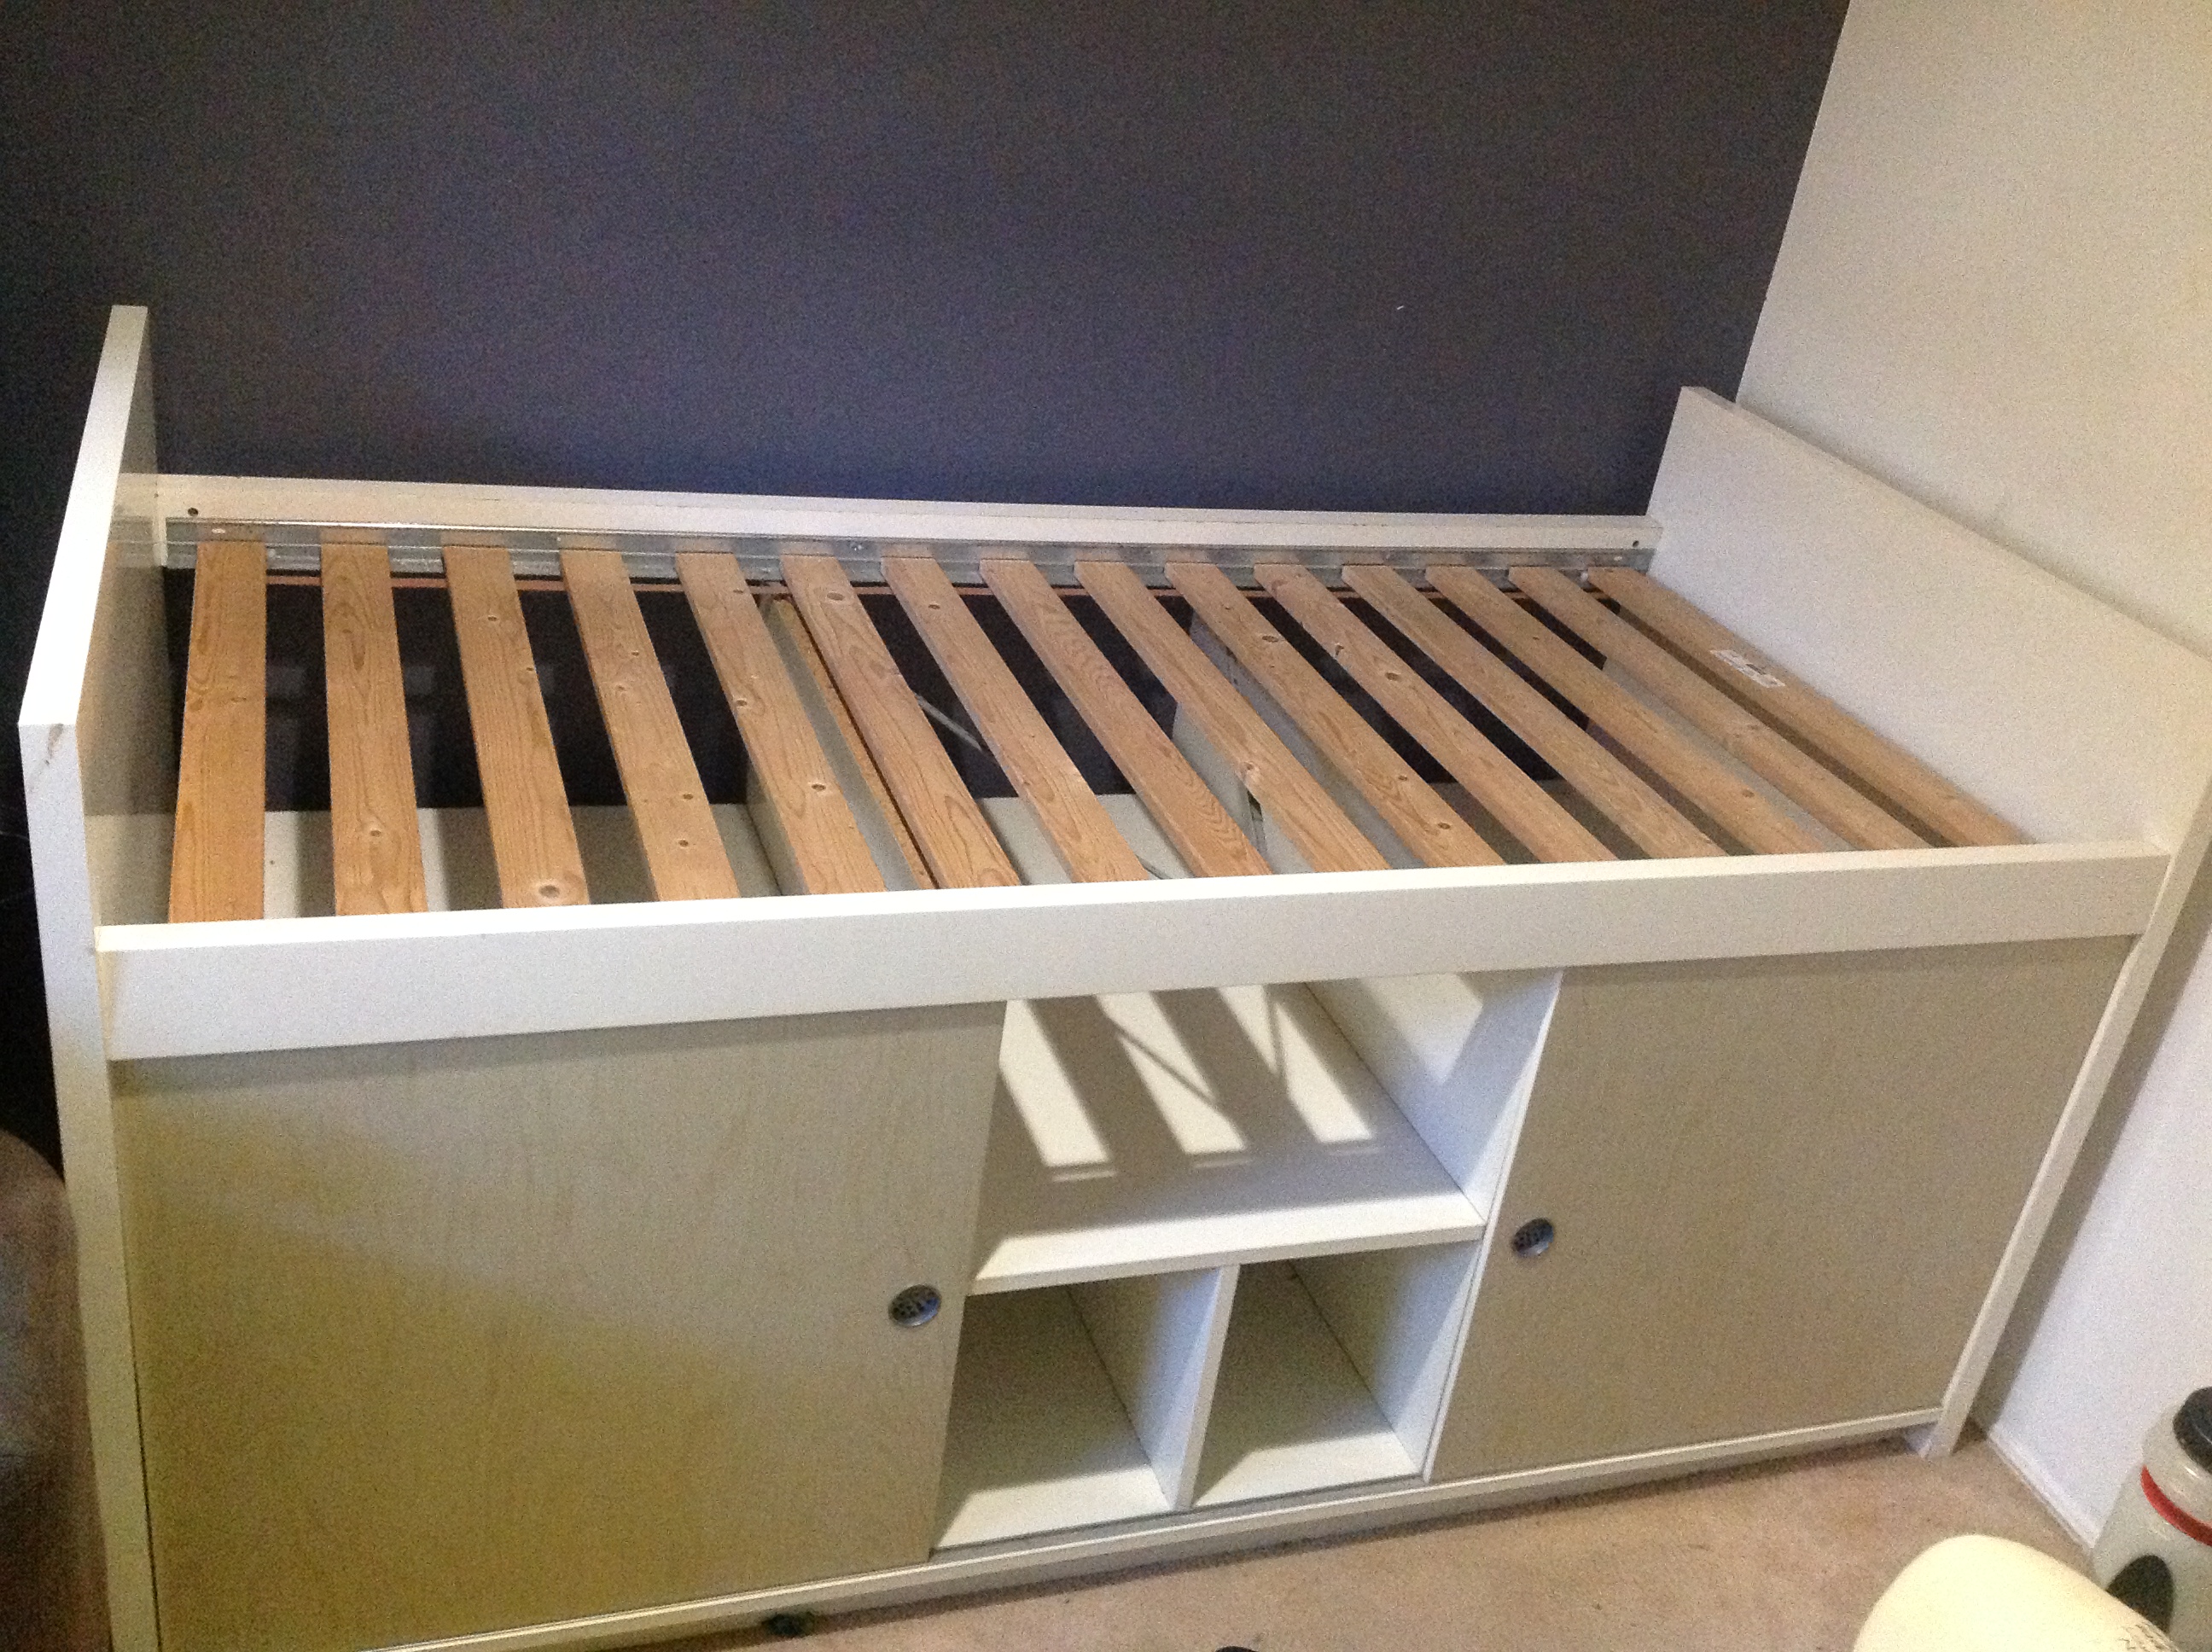
The bed has more shelves behind those sliding doors, and there is access from both sides of the bed, so the space deep underneath is not wasted. Clever, clever IKEA! I could write a love story about it…
A quick aside about IKEA furniture:
If you buy any used IKEA furniture that is still in their current range, you can download the assembly instructions on the IKEA website.
There is an entire design movement based on modifying IKEA furniture! It’s called “IKEA Hacking” and here are a couple of web-sites that document this interesting pastime! IKEA Hackers, and My Domaine.
Back to the new bed…
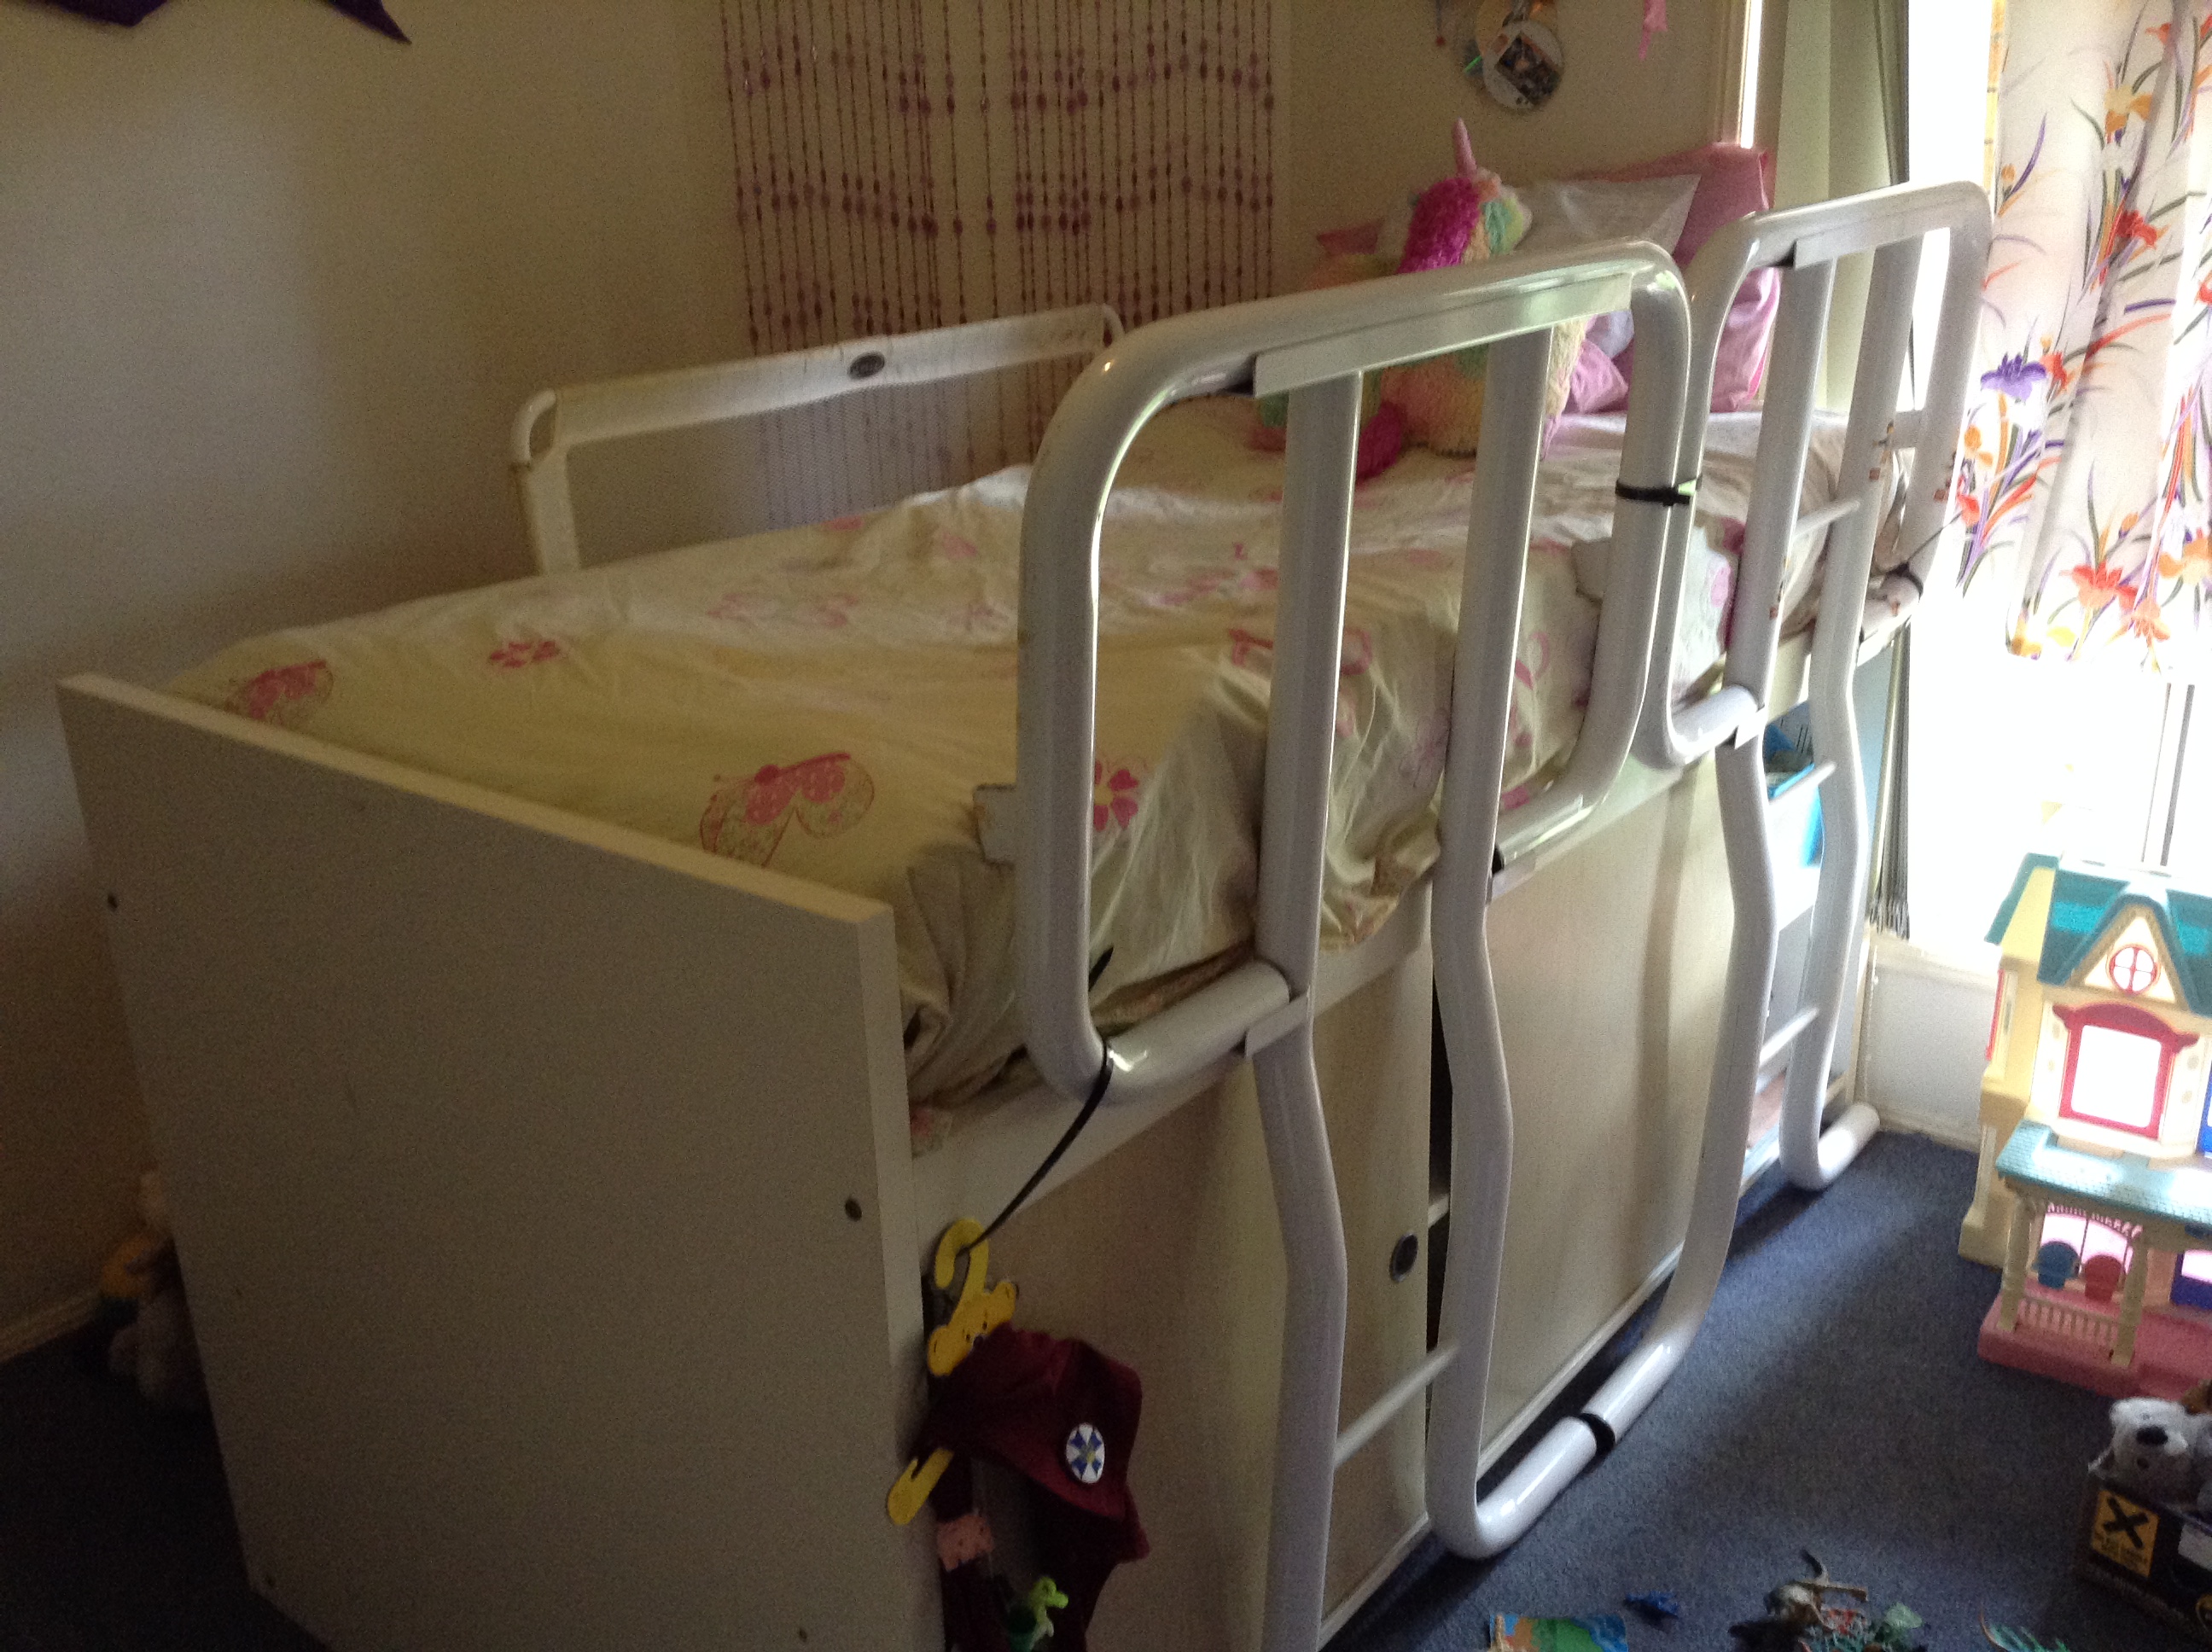
Falling out of bed:
Unfortunately, the mattress sits up so high on the new bed, there is nothing to stop little miss from rolling out in the night. The emergency (and very ugly) solution was an old toddler-style bed-rail on one side, and the bedheads from her old bunk bed zip-tied to the other side! We needed to come up with a better look, fast!
 Home-made bed-rails:
We decided on making some custom bed-rails out of mdf (medium-density fibreboard- you may call it craftwood) in a design of Ellie’s choosing. Of course, the answer was “dragons!”
The design:
Ellie did a couple of preliminary sketches.

Measuring out the size required:
The plan was to cut two dragons from this piece of board: one for each side of the bed.


Sketching the design onto the board:


Ellie did the original sketch and I refined it and darkened it up, ready for cutting out.


Then my husband cut it out with the jigsaw, and I traced the outline so he could cut an identical second piece.
Tracing, cutting and copying to make the second identical dragon (in reverse):
- I traced the first drawing,


- flipped the tracing paper over onto the second piece of wood and stuck it in place,


- then pressed the traced image onto it.


Hint: Don’t spend lots of money on expensive tracing paper! I used cheap, supermarket-brand baking paper to do the job easily.
Darkening the outlines:
The hope is that with the outlines darkened, we will be able to paint the dragons, but still see the outlines through the paint so we can re-draw them onto the painted finish. Liam helped me during this stage, so I can proudly say that this project has been a product of the entire family!


Voila! Two identical dragons, in reverse, ready to be painted.
Credit to the kids:
As I often encourage, the children were both involved in this project. They love being a part of it, and often surprise me with their abilities. I don’t, however, let anyone touch my mosaic! I’m very pedantic about that project, as it involves greater skill, and it has become my “escape” from parenting; my little bit of solitude.
What projects do you let others help you with, and what do you like to do alone?

This is a creative solution. I love that everyone helped. Can’t wait to see how the look on the bed.
LikeLike